Installing Tips for a Shower ValveA Story by benjamindsozaA shower valve replacing is very easy. Each one of the tips and tricks and we have discussed each one of them below about the shower valve.Install a Shower Valve To install a shower valve, you'll first need to remove the
old valve. Next, ensure the copper is perfect. Sand off the copper pipes and
guarantee they are free of solder and brambles. I needed to slice the copper near the old valve so that the
new valve would fit, and there was a great deal of solder on the funnels. You
can either document this off or heat up the copper and wipe off the blotches of
solder with a dry cloth when it runs. Be mindful so as not to copy yourself
when you do this and keep a splash container and fire quencher helpful at
whatever point you utilize the light. Wrap up by sanding off any staying solder
and ensure it's spotless the distance around the channels.
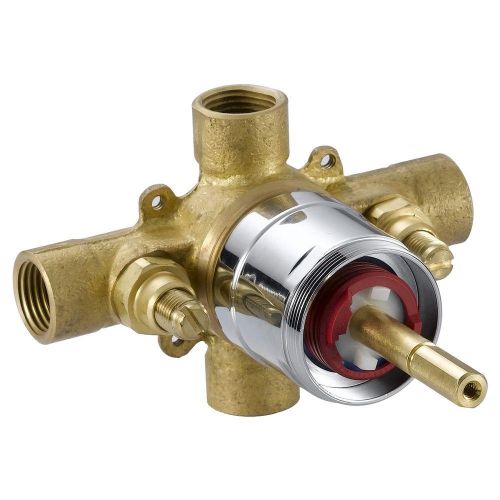
Disassemble the Valve Remove the plastic cartridge and any lodging from the valve
body before doing any soldering; the plastic segments can't face the heat.
Monitor how the cartridge turned out in light of the fact that you'll have to
return it in confronting a similar bearing. Outside Prep Before putting the shower valve in the divider, make any
changes important. If the valve will go into a shower without an attached
bathtub, the base of the valve should be topped. Make a point
not to top the wrong end. Position the valve so that the part that says "shower"
or "up" is looking up. Adhere to the standard directions for
soldering copper and top the base channel of the valve. Give the valve a chance
to cool before proceeding onward to the following stage. Apply the transition to the majority of the valve associations
and the pipe before putting the valve in the divider. Position the Valve Move the valve into position. Sometimes it's difficult to
get the valve into place in the divider since space is tight, so do it just
once, if conceivable. Also be mindful so as not to drop the valve in the
divider as you set up it. Tip: Some individuals get a kick out of the chance to tie
wire onto the valve so that if they do drop it, they can pull it back up. Usually least demanding to put the valve on to the shower
riser first and after that, the sides can fly into the sides of the valve. Be
sure that the copper pipe pushes in the distance so that you can make a decent
joint. One strategy is to make a check around an inch far from the finish of
each pipe since the fitting just pushes in around an inch. Solder Be cautious when soldering in little spaces to ensure
nothing catches ablaze; have the splash container of water and a fire quencher
prepared. It can also wet the divider somewhat first with the splash bottle.
Since these funnels are normally just a large portion of an inch, you needn't
bother with a major fire. Concentrate on one joint at any given moment and ensure the
solder streams all the divider around the joint, particularly on the posterior
where it's difficult to see. An examination mirror will enable you to check
whether the solder streamed the distance; contact up a territory if required
before turning on the water. Cool Down Permit time for the channels and the shower valve to cool
subsequent to soldering before re-installing the shower cartridge. Reinstall
the shower cartridge indistinguishable route from it was removed. Ensure that
the shower valve is in the off position; then turn the water back on and check
for breaks. Ensure there aren't any breaks in the shower riser also. Finish Finally, install the trim and handle. Set the cover plate,
then screw on cartridge sleeve. The handle goes on last and you are finished! © 2018 benjamindsozaAuthor's Note
|
Stats
73 Views
Added on November 28, 2018 Last Updated on November 28, 2018 Tags: shower valve parts, shower rough in valve, kohler shower diverter repair AuthorbenjamindsozaMiami Beach, FLAboutI am benjamindsoza. I am an DIYer. I want to learn and growing up my knowledge about of online market. more..Writing
|

 Flag Writing